Automating data import from REDCap
Redcap is fantastic for storing your valuable research data. But everytime you add or update results you need to download the newest data to rerun your analyses, which quickly gets tedious. Luckily there is faster and better way: use REDCap’s API!
Table of Contents
Introduction
Most (sane) researchers probably use Redcap to collect and store their valuable research data. The advances of using REDCap are plentiful: Reproducibility, automatic backups, data safety, GCP-compliant logging, etc. If you still organize your hard-earned data in an Excel spreadsheet (yikes!) then return here when you have seen the REDCap light.
While REDCap is amazing, is does has one minor disadvantage. Everytime you add a new record, correct an error or change anything in REDCap, you need to download your data again to your computer before you can re-run your analysis. And since each file you export from REDCap has a new an unique name, you also to update your Stata do-file. This my friend is repetitive and boring monkey work. And nobody likes monkey work.
Luckily, you can automate the process of downloading data directly within Stata. All it takes is five minutes and a few lines of code in your do-file.
TL;DR
If you are the impatient “I saw the Harry Potter movies but never read the books”-type, then you can download the Stata do file here. If you are the type that want all the nitty-gritty details, then read on.
What is API?
API stands for Application Program Interface. It is basically a programming language that computer programs use to communicate with each other.
Let’s use the Facebook app as an example. What happens when you check your newsfeed?:
- The app sends an API request via the internet to Facebook’s server along with a confidential API key or password. The API request is a description of what data the app wants the server to send. The API key is a unique password that lets the server know who you are and what data you should have access to.
- Once the server has confirmed who you are, it processes the request to find the data you need.
- The server then sends back an API response, containing the data that the app requested. In this case, the response would contain your notifications, the latest cat pictures on your newsfeed, and tons of ads.
You can also picture the API as the waiter on a restaurant. You request some food, the waiter carriers the request to the kitchen, the kitchen process the request, and sends the waiter back with a response in form of a nice enchilada.
Enough with the theory. Time to put it to use.
Setup
In REDCap, the API is deactivated by default for security purposes, so you need to active it.
REDCap settings
To enable API, navigate to “User Rights”, click on your username, click “Edit user privileges”, tick “API Export” and save changes: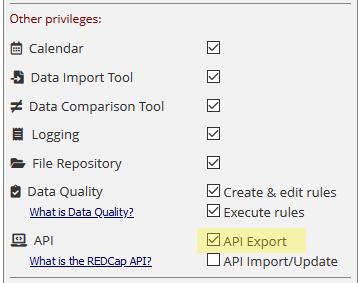
Once you has access, update the page. You should see a new “API” app in menu to the left: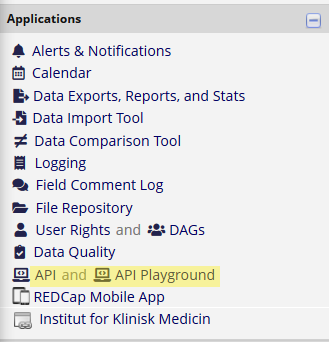
Note: Unless you know what you are doing or you are just playing around with a test database, I advice strongly against checking the “API Import/Update”. If you fool around with the API import function, you can in theory overwrite your entire database.
Getting the API key
Click the API menu. Click “Generate API token”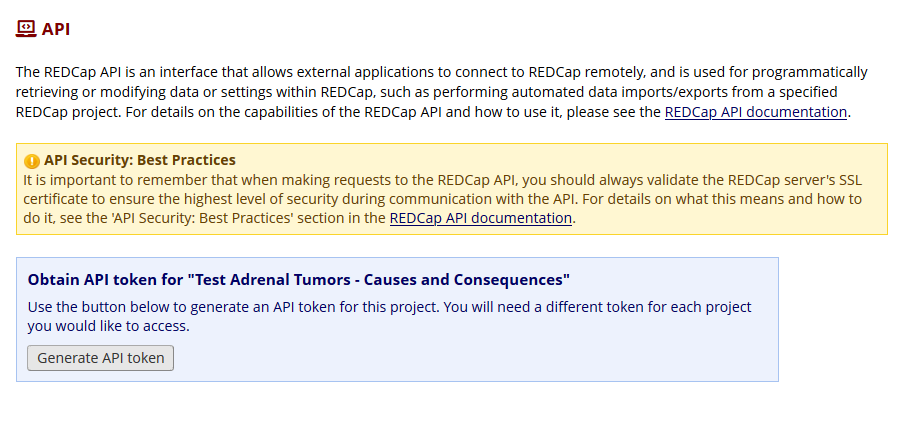
A 32-character text string appears. This is your API key (or API Token in REDCap lingo).
We need to save it for later. Open Notepad (or TextEdit for MacOS), copy/paste the API token and save it as “APIKEY_redcap.txt” in your working folder: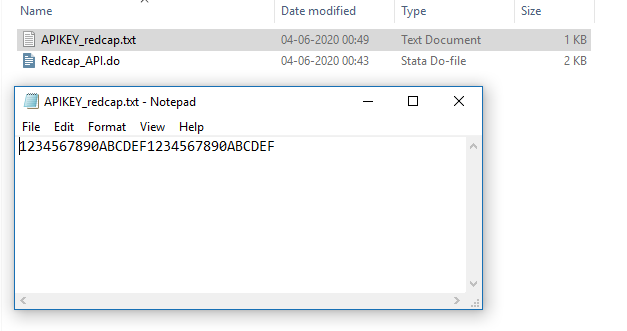
A word of warning: The API key is confidential! Anyone with the API key can download your entire dataset including social security numbers and other patient identifiable data. Treat your API key as you would treat your pin code to your credit card.
cURL
We will use the nifty little program, cURL, to communicate with the API. cURL is short for Client URL. It is program used for interacting webpages and servers with commands instead of using mouse and keyboard.
It should be preinstalled on Windows 10 and newer versions of MacOS. To check if it is installed, first open the terminal by pressing the Windows-key and search for “Command Prompt” (in MacOS: press Cmd + spacebar and search for “Terminal”). Once in the terminal, type curl --V (MacOS: curl –version). If the output looks something like this, you’re good to go:
If cURL is not installed, follow this guide.
In Stata
Time to open Stata. We will use Stata’s shell function to run cURL and interact with the REDCap API. You can copy/paste the step-by-step guide below into your own do file or download the entire code
here.
Define settings for cURL
First we need to supply the settings that cURL needs to communicate with REDCap:
***** Redcap_API.do *****
version 15
clear
file close _all
set more off

*** Import secret API key
file open text using APIKEY_redcap.txt, read text // Txt file containing API key
file read text token // Store API key as local 'token'

*** cURL Settings (update to match your system and REDCap)
local curlpath "C:/Windows/System32/curl.exe" // Folder where cURL is installed (MacOS: "/usr/bin/curl")
local apiurl "https://redcap.au.dk/api/" // Link to REDCap database
local outfile "redcap_export" // Name of the output file
The first part imports the secret API key from the text file we saved previously. We could also just add the key directly in the do file by typing local token = "1234567890ABCDE...". But if you did that and shared your do file or log with somebody, you’ve had to remember to remove the API key beforehand. Storing the API key in a separate file is safer. You’ve wouldn’t keep your pin code in your wallet next to your credit card either, right?
The second part stores the location where cURL is installed and the link to your institution’s REDCap database. Update both curlpath and apiurl to match your system and REDCap database. You can also change the name of the final output file if you want.
Note: Stata deletes the content of all locals as soon as it has run the do file until the end. Therefore, you need to run the entire do file from the top to bottom for this code to work. Otherwise, Stata will just throw angry red errors in your face.
Run cURL
Now it is time to run cURL:
*** Run cURL command
shell  `curlpath' 	///
	--output `outfile'.csv 		///
	--form token=`token'	///
	--form content=record 	///
	--form format=csv 		///
	--form type=flat 		///
	`apiurl'
The code might seem a bit complex, but basically shell is Stata’s way of asking Windows (or MacOS) to run a program on the compute. In this case, the program is curl.exe, which we previously stored in the local curlpath.
The next two lines specify that cURL should save the output with the name stored in the local outfile and that the API key is found in the local token, which we both defined above.
The four lines beginning with --form specify what kind of data we want. In this case, we want to download all records (token=record), we want the data in csv format (format=csv), and each observation should be on a separate row (type=flat).
The last line specify that REDCap can be found in URL provided in the local apiurl.
Now, run the entire do file. A window should pop up, and after a few seconds, data should appear as a csv file in your folder. Accio data. It’s freaking magic!
Import to Stata and add value label
You’ve downloaded the data but it is still in a “raw” csv file. You’ll want to convert it to Stata format and then add all those lovely value labels that you spent so much time writing in your REDCap database.
Importing first:
*** Convert CSV file to Stata format
import delimited `outfile', ///
	bindquote(strict) /// Fix quotes in text fields
	stringcols(2) // Import second variable as string (Optional. Relevant if 2nd var is an ID var with leading zeroes such as SSN, CPR or similar study ID)
erase `outfile'.csv // Delete csv file
If you’ve used import delimited before, this part should be pretty straight forward. Note, that in my databases, the second variable is usually some unique study ID like a social security numbers. Since these IDs often contain leading zeroes (“0123456789”), I force Stata to import the second variable as a string with the option stringcols(2), so Stata doesn’t think that they are numbers and remove the first zero (“123456789”). To keep my computer neat’n tidy, I also ask Stata to erase the csv file.
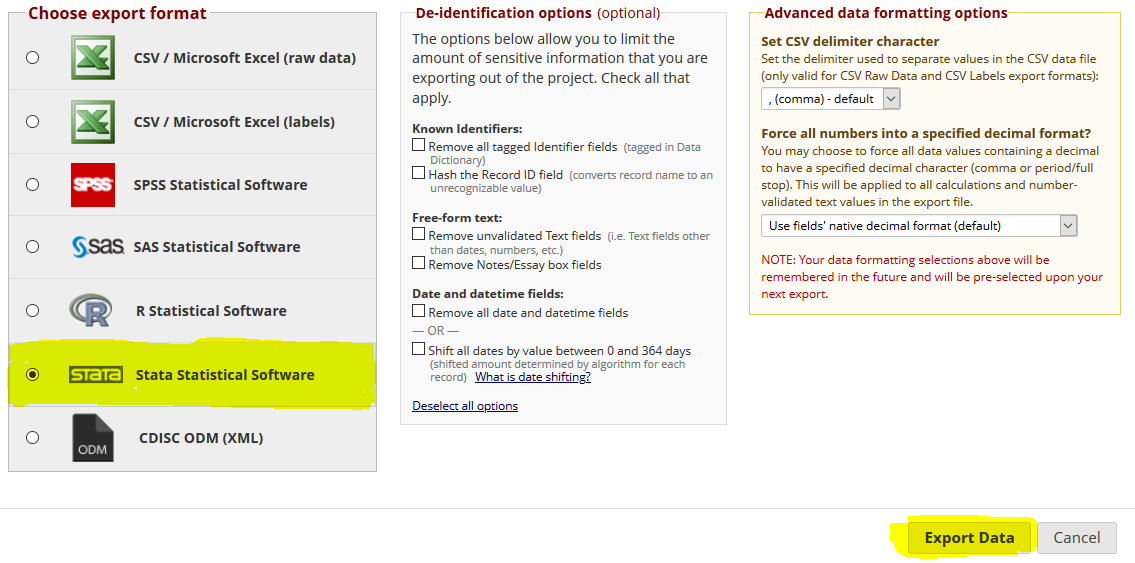
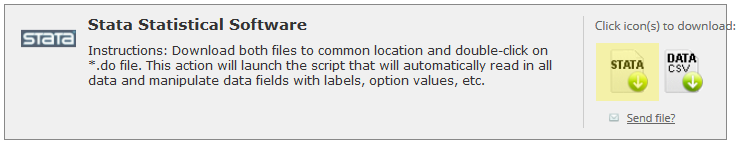
Last thing we need is to add the value labels from REDCap. You’ll need to download the labels manually from REDCap: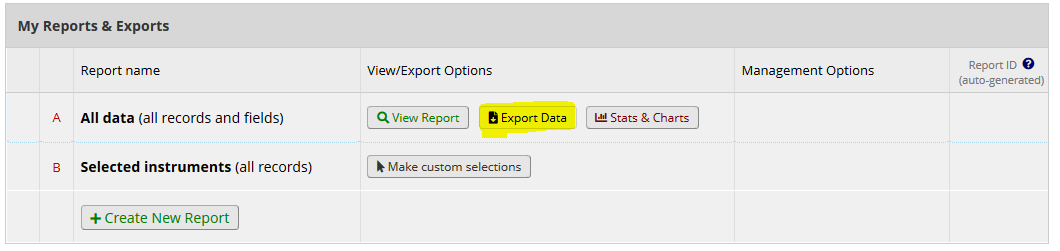

Open RedcapValuelabel.do and delete the first 7 lines of code, so it doesn’t interfere with our do file: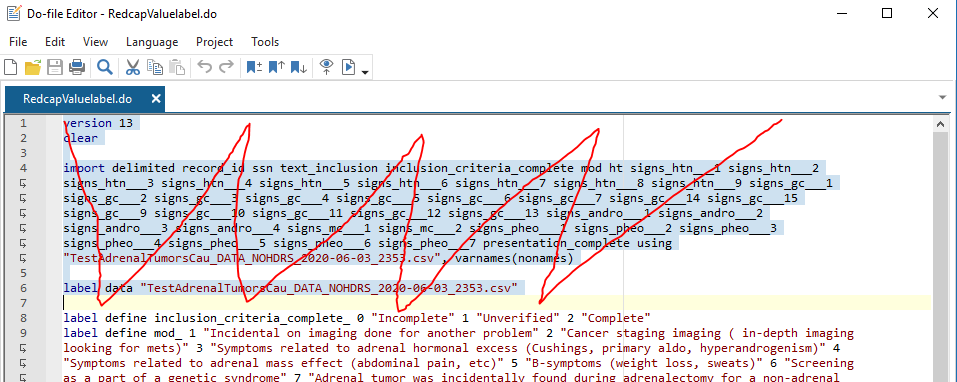
Save the changes and go back to your main do file. Note, that you need to do this every time you make changes to your REDCap database.
Now you only need to add a few lines of code to add the value labels and save the final output:
** Apply value labels (Optional).
do RedcapValuelabel.do, nostop

** Save
save `outfile'.dta, replace
The nostop option forces Stata to run the do file until the end, even if it encounters an error along the way. While this option is generally not recommended, it is practical in this specific setting, since you might later ask cURL to only download specific variables from REDCap (See below). If you were to only download some specific variables (included and disease for example), then RedcapValuelabel.do would produce an error and stop, when trying to label all the other variables that haven’t been downloaded. Nostop prevents that.
Final remarks
And now you are done! Congratulations on becoming your office’s resident API wizard. Hopefully, it all worked like a charm. See the sections below for troubleshooting and tips on other API features.
Troubleshooting
If the code doesn’t work, make sure you’ve specified the correct apikey and apiurl, and that you run the entire do file from top to bottom. If that doesn’t do it, try downloading my do file from Github and see if you’ve made a typo. If it still doesn’t work, then don’t hesitate writing to me.
Error message: You do not have permissions to use the API
I’ve received a few emails from people getting this error in their CSV file instead of the lovely data they expected.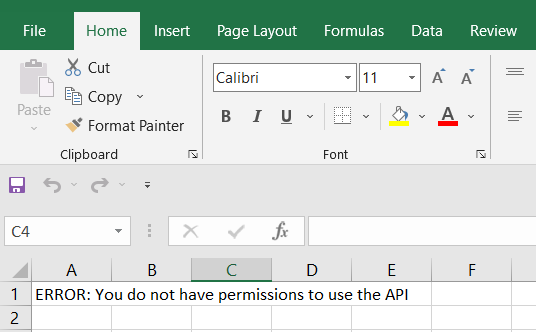
Read/write issues with Stata and Mac computers
If you are a Mac user, then you might have issues with read/write access in the folder you are trying to download the csv file into.
Maybe you have accidentally changed the working directory to some weird folder in your system which contains stuff you really should not be messing with. Your can check your current working folder by typing cd. You can change working folder to the project folder by typing cd "pathtoprojectfolder".
If you are in the correct working folder then you probably need to change your access from “read only” to “read/write access”. A guide on how to do this can be found here. Thanks to Jeniffer Nagudi (University of the Witwatersrand, South Africa) for pointing this out to me.
Download specific records with filter logic
If you only need specific patients (records), you can use REDCap’s filter logic to specify which records the API should to download. This can make downloading a lot faster if you have a large database. For example, you might only need the patients that were included in your study (included=1) and got the disease you are interested in (disease=1). To select these records, you only need to add a single line to the shell command:
shell  `curlpath' 	///
	--output `outfile'.csv 		///
	--form token=`token'	///
	--form content=record 	///
	--form format=csv 		///
	--form type=flat 		///
  --form filterLogic="[included]='1' and [disease]='1'"   ///
	`apiurl'
Download specific variables
Similarly to the example above, you might not want to download all variables. This could be relevant if only want inclusion status and disease status but don’t want to download patient identifiable data like social security numbers etc. You can then specify the variables you want to download by adding the --form fields[]=varname option:
shell  `curlpath' 	///
	--output `outfile'.csv 		///
	--form token=`token'	///
	--form content=record 	///
	--form format=csv 		///
	--form type=flat 		///
  --form fields[]=included	///
  --form fields[]=disease	///
	`apiurl'
There are tons of options like this. Check sources for more inspiration.
Sources
Most of this code is heavily inspired by (i.e. copy-pasted from) this magnificent code posted on Github. It is written by “Luke” who appears to be REDCap’s version of Dumbledore. Thanks Luke!
He has also writting a bunch do files for doing more complex stuff with the API that you should check out, if you want to download metadata, download specific data forms, reports etc, or if you want to learn how to upload data.